Space Cloud lets you leverage all the capabilities of Kubernetes without having to learn the Kubernetes API.
If you don’t already have a docker container published for your code/service, then you should check out deploying your code.
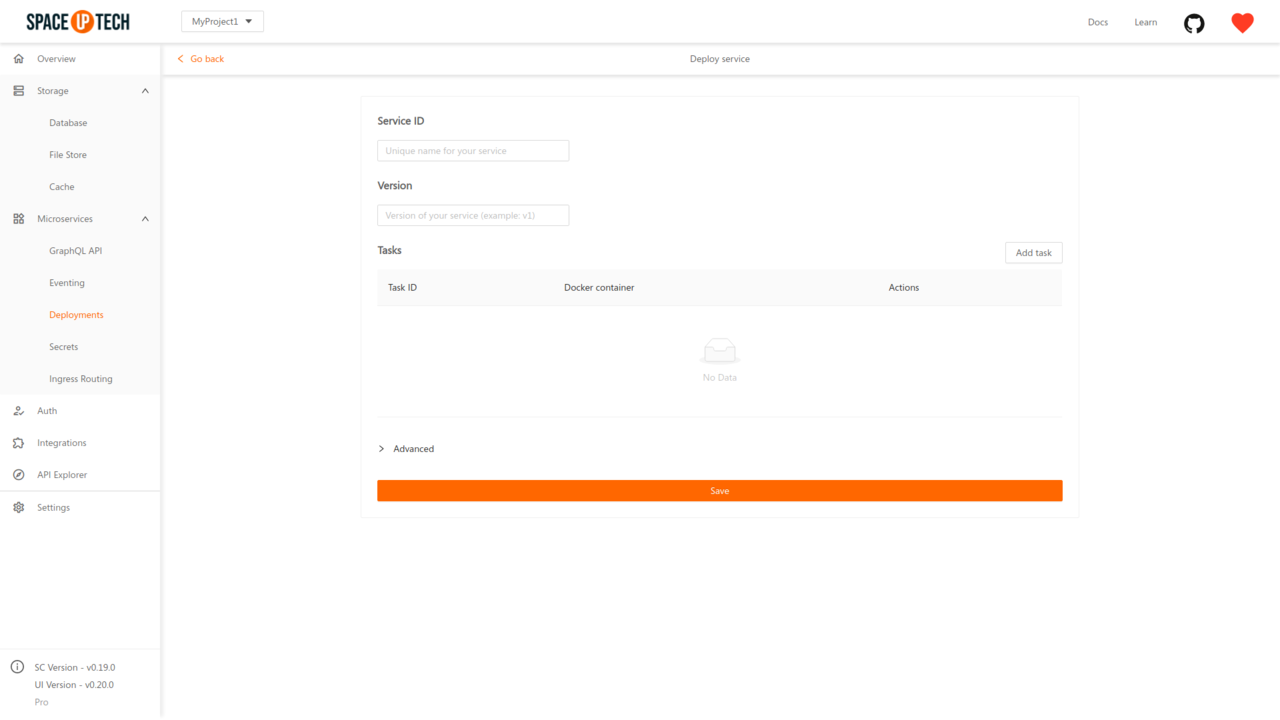
Checkout to the Deployments section in the Microservices navigation. Click on the Add button to open the following page to create a service:

Enter the following config:
v1) to identify the different versions of your service.Space Cloud supports multiple tasks in a service. Most applications don’t require multiple tasks per service. However, some use cases require that certain containers be co-located because of their tight coupling. For example, one container serving data stored in a shared volume to the public, while a separate sidecar container refreshes or updates those files. In such use cases, you should add multiple tasks to a service.
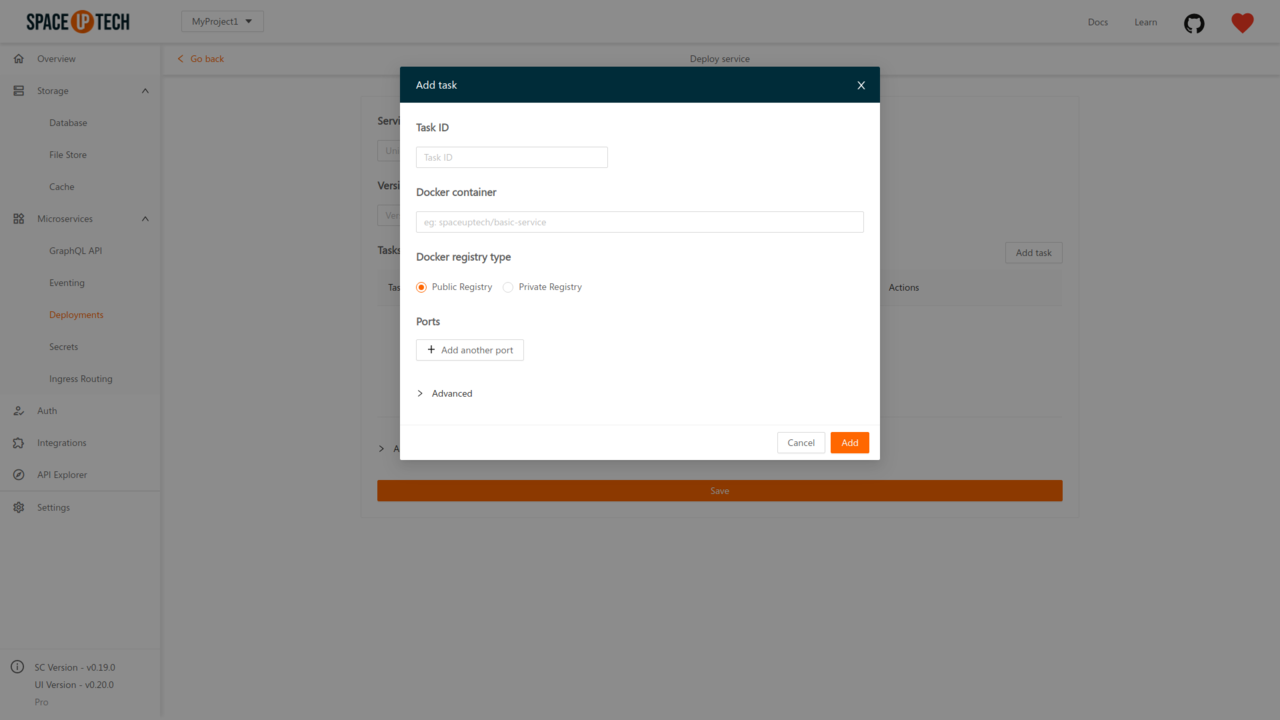
To add a task, click on the Add task button. You will see the following modal:

Enter the following config for the task:
Hit the Add button to add the task.
Once you are done adding all the tasks, hit the Save button to deploy the service.
We haven’t changed any of the advanced configurations in this example. Feel free to explore those as well.
Space Cloud will now pull the docker image(s) (if it was not cached earlier) and run the docker container(s) with the specified ports being exposed.
You can deploy containers from any docker registry as long as it is accessible to Space Cloud.
Space Cloud also creates an internal domain to access the service from within the cluster. This internal domain is of the following format:
<service-id>.<project-id>.svc.cluster.localAssuming your project id is myproject, and you have named your service as myapp, then the internal domain will be:
myapp.myproject.svc.cluster.localUnder the hood Space Cloud also configures Istio and setups up mtls, authentication policies and more to secure your deployments by default.