Note:
--remove-project-flag. If you are using space-cli then you can use the following command to start space cloud - space-cli setup --env REMOVE_PROJECT_SCOPE.You need to follow some steps before adding an existing database based on where your existing database is:
--remove-project-flag. If you are using space-cli then you can use the following command to start space cloud - space-cli setup --env REMOVE_PROJECT_SCOPE.The databases started with space cli have fixed hostname of the following format:
<db-alias-name>.db.svc.cluster.localFor example, if you have kept the DB alias name of your database as mydb while spinning up the database via space-cli, then your hostname will be:
mydb.db.svc.cluster.localNote down this hostname as it will be used while adding the database to Space Cloud.
If you have run Space Cloud via space-cli but have an existing database (inside a docker container) not started by space-cli, then you need to follow these extra steps.
Connect you database to Space Cloud’s network by running the following command:
docker network connect space-cloud <your-database-container-name>For example, if your database container name is some-mongo, then you need to run:
docker network connect space-cloud some-mongoInspect your database container to get its IP Address. Run the following command:
docker inspect <your-database-container-name>It will log a very big JSON object on the console. The IPAdrress you are interested in will be under Networks.space-cloud key. This is the IP Adrress that will be used as the hostname while adding the database.
Make sure you have created a Kubernetes service for your database inside a particular namespace.
The namespace containing your database service should be different from your space cloud project id.
The hostname of your database for Space Cloud would then be:
<service-name>.<namespace>.svc.cluster.localFor example, if you have created a service named my-postgres inside my-databases namespace, then your hostname will be:
my-postgres.my-databases.svc.cluster.localNote down the hostname as it will be required later while adding the database to Space Cloud.
If you are using one of the managed services like AWS RDS, Google Cloud SQL, etc. you need to get the hostname of the database from the console of that managed database.
Head to the Mission Control. If you have not already created your project, first create your project:
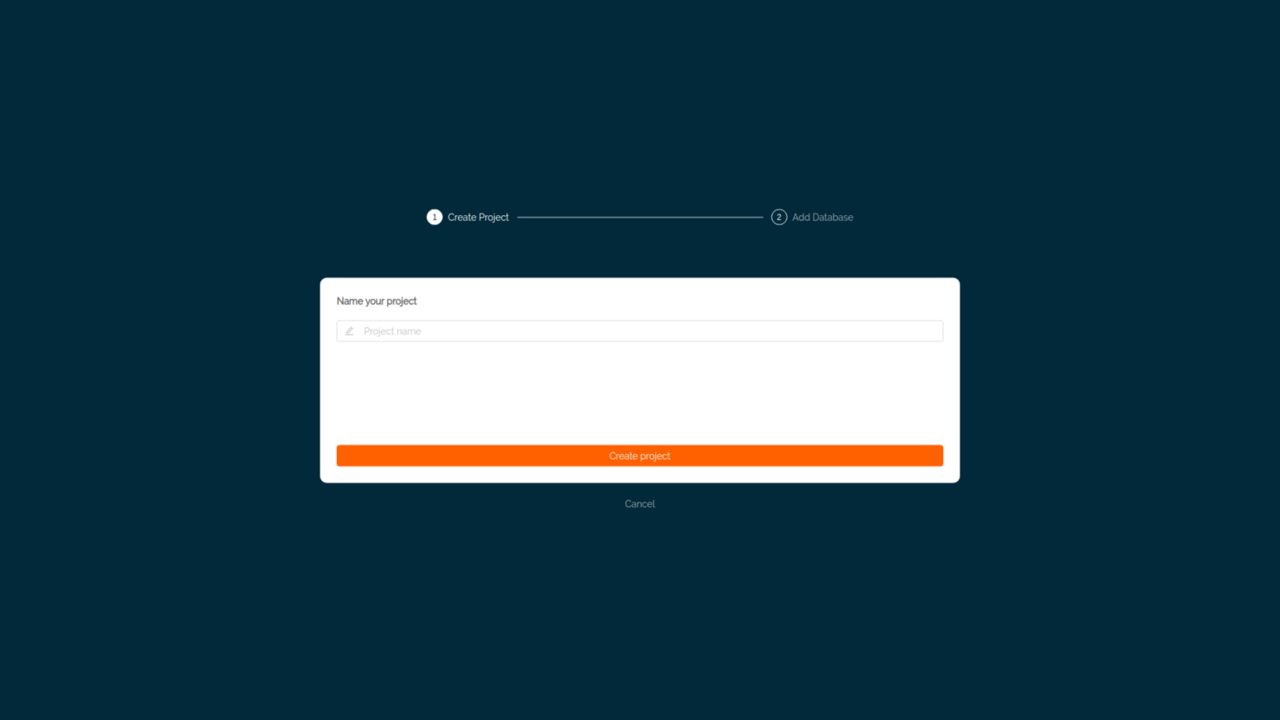
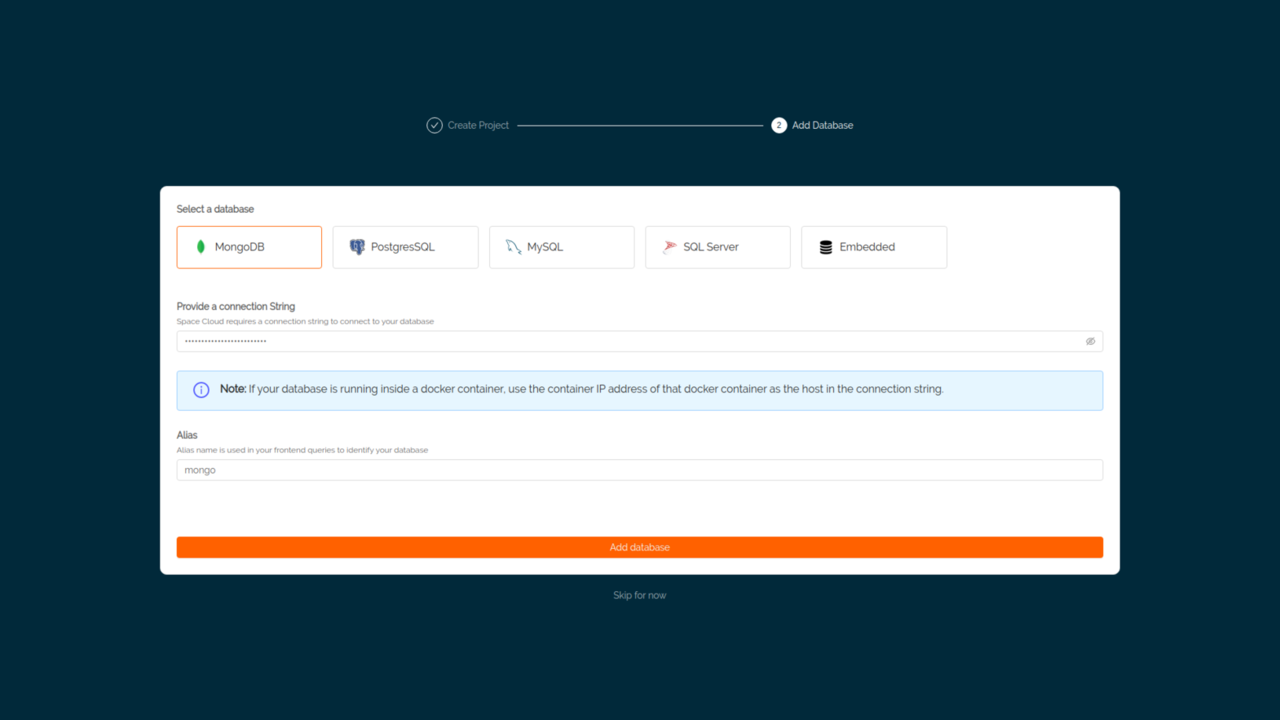
While creating a project, you will be prompted to add a database to your project with the following screen:
Note: You can also add database(s) later to your project. To add a database to your project, you need to go the
Databasesection of that project, click on the database selector/dropdown and then click on theAdd databasebutton to open the screen to add a database.
First, select a particular database that you want to add.
Then, provide the connection string of that selected database. The connection string is of the following format for the various databases:
mongodb://<hostname>:<port>postgres://<username>:<password>@<hostname>:<port>/<database>?sslmode=disablemysql://<username>:<password>@tcp(<hostname>:<password>)/<database>Data Source=<host>,1433;Initial Catalog=master;User ID=<username>;Password=<password>@#;Use the hostname collected from the prerequisite step in the above connection string format.
Then, give your database an alias name. The alias name that you provide here should be used in your GraphQL queries to identify your database (since Space Cloud can work with multiple databases). By default alias name is mongo, postgres, mysql and sqlserver for MongoDB, Postgres, MySQL and SQL Server respectively.
For example, if you change the alias name to mydb, then your GraphQL queries should be updated to include mydb like this:
query {
  pokemon @mydb {
    id
    name
  }
}
Finally, click on the Add database button. That’s it! You have added your existing database to Space Cloud! You can now start tracking your existing tables/collection or create new ones.
Tracking a table/collection in Space Cloud exposes that table/collection via its GraphQL/REST APIs to the outside world (with security rules of course).
New tables created via Mission Control are automatically tracked. However, existing tables need to be explicitly tracked if you want to expose them via Space Cloud’s GraphQL/REST APIs.
To track existing tables, head to the Overview tab of Database section in Mission Control. If you have any existing tables in your database that haven’t been tracked yet, you will see them under Untracked Tables like these:
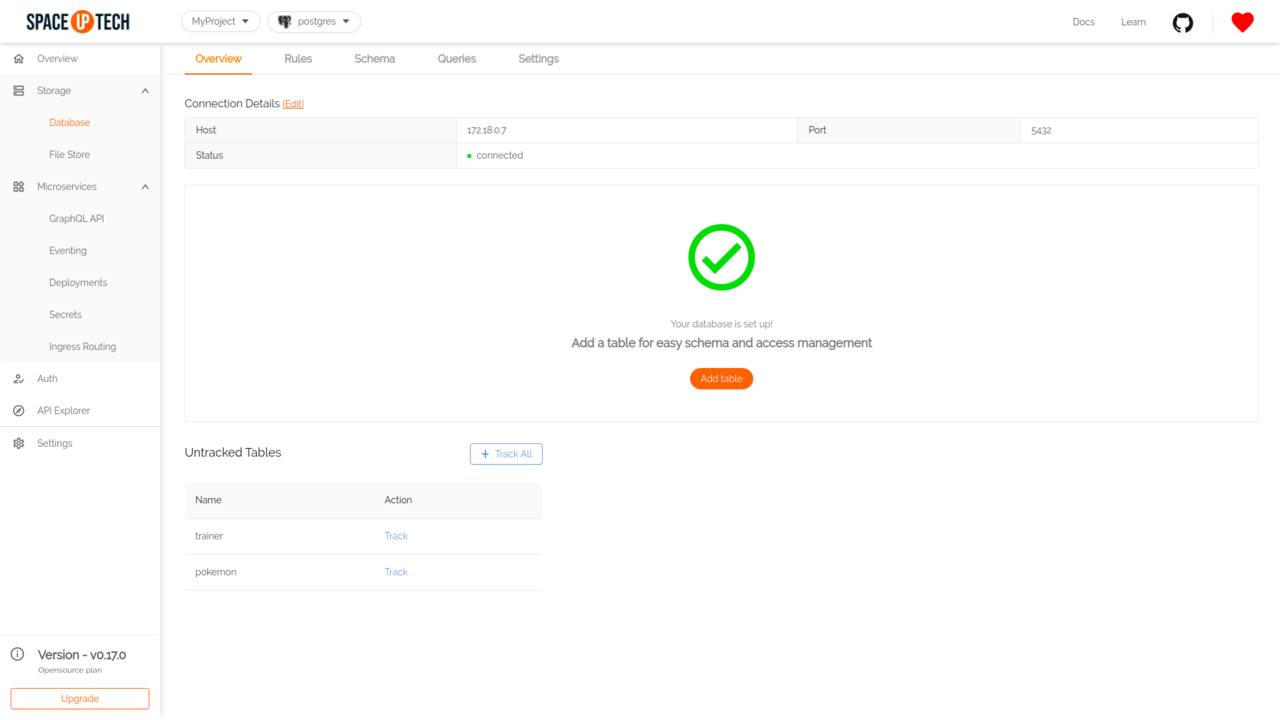
Click on the Track button beside the table name that you want to track. If you want to track all tables/collections, then click on the Track all button.
You don’t need to provide a schema while tracking tables in SQL databases as Space Cloud understands it automatically by inspecting the database. However, in the case of schemaless databases such as MongoDB, you need to edit the table after it is tracked to provide a schema.
Space Cloud automatically detects and tracks any primary/foreign keys when you track a table. However, as of now, indexes are only tracked if the index name starts with index.
There are 2 workarounds this problem:
index.The following SQL query can be used to rename an index:
ALTER INDEX <index-name> RENAME TO <new-index-name>;ALTER TABLE <table-name> RENAME INDEX <index-name> TO <new-index-name>;EXEC sp_rename N'<schema-name>.<table-name>.<index-name>', N'<new-index-name>', N'INDEX';That’s it you can now start various operations on your existing data like:
Have a technical question?


Improve the docs!
