There are two ways of triggering custom events:
You can trigger your custom event asynchronously either via Mission Control or programmatically via the HTTP API of Space Cloud. You can also schedule an event for the future.
To deliver/queue an event to Space Cloud asynchronously, make an HTTP POST request to Space Cloud:
Endpoint:
http://<space-cloud-url>/v1/api/<project-id>/eventing/queueJSON payload:
{
  "type": "<event-type>",
  "delay": "Number",
  "timestamp": "Number",
  "data": "Object"
}| Key | Type | Required | Default value | Description |
|---|---|---|---|---|
| type | String | yes | Type of event. | |
| timestamp | Number | no | Used to schedule event trigger at the given timestamp (in milliseconds) schedule time for event trigger. | |
| delay | Number | no | 0 | Number of seconds to delay the trigger from timestamp. |
| data | Object | no | null | Event data. |
For example,
{
  "type": "sent-email",
  "data": {
    "to": "user1@email.com",
    "from": "user2@email.com",
    "subject": "Some Subject"
  }
}You can schedule events to be triggered later by using timestamp and/or delay fields:
Example: Delay event trigger by 1 minute:
{
  "type": "my-custom-event",
  "delay": 3600,
  "data": {
    "foo": "bar"
  }
}
Example: Schedule event trigger for a particular time:
{
  "type": "my-custom-event",
  "timestamp": 1587902400,
  "data": {
    "foo": "bar"
  }
}
Example: Delay event trigger by 1 minute from a particular time:
{
  "type": "my-custom-event",
  "delay": 3600,
  "timestamp": 1587902400,
  "data": {
    "foo": "bar"
  }
}Custom event triggers can be invoked via the Mission Control as well.
Head to the Eventing section and click the Trigger button for any event trigger in the Actions column to open the following form:
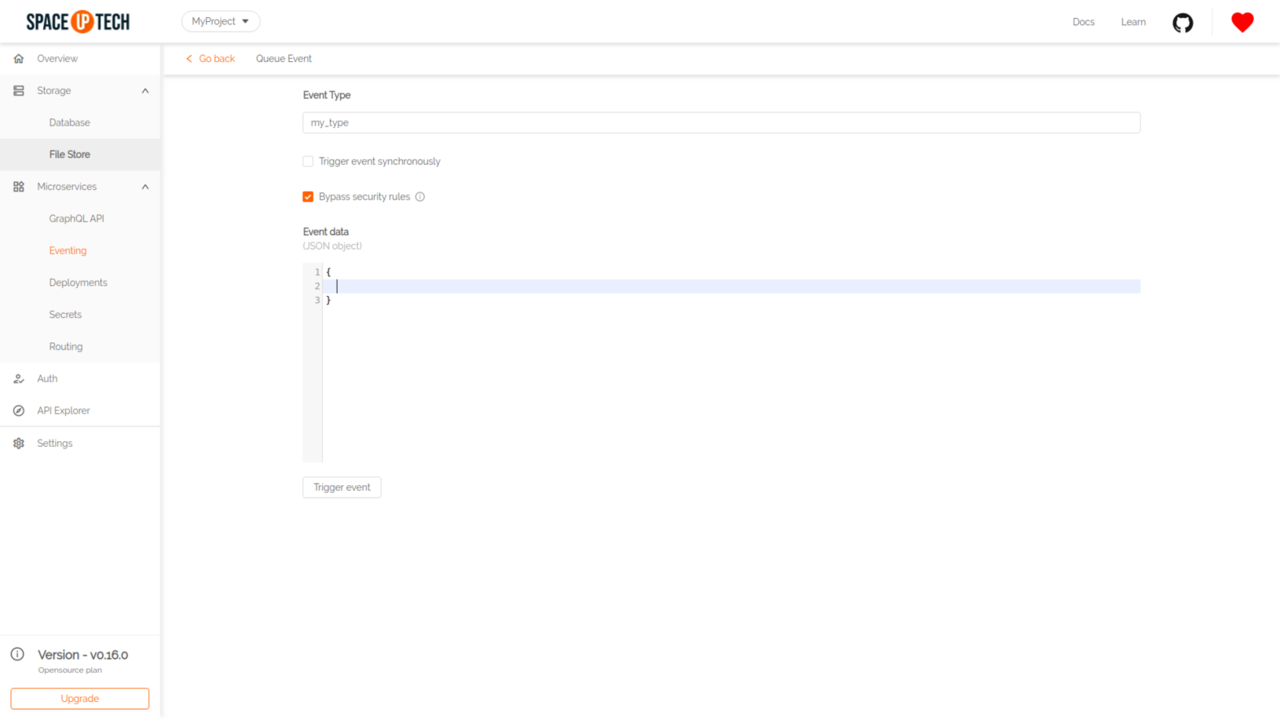
Put the event data and hit Trigger.
You can trigger your custom events synchronously either via Mission Control or programmatically via the HTTP API of Space Cloud. An event is made synchronous by specifying the isSynchronous option.
To deliver/queue a synchronous event to Space Cloud, make an HTTP POST request to Space Cloud:
Endpoint:
http://<space-cloud-url>/v1/api/<project-id>/eventing/queueJSON payload:
{
  "type": "<event-type>",
  "delay": "Number",
  "timestamp": "Number",
  "data": "Object",
  "isSynchronous": true
}| Key | Type | Required | Default value | Description |
|---|---|---|---|---|
| type | String | yes | Type of event. | |
| timestamp | Number | no | Used to schedule event trigger at the given timestamp (in milliseconds) schedule time for event trigger. | |
| delay | Number | no | 0 | Number of seconds to delay the trigger from timestamp. |
| data | Object | no | null | Event data. |
For example,
{
  "type": "sent-email",
  "data": {
    "to": "user1@email.com",
    "from": "user2@email.com",
    "subject": "Some Subject"
  },
  "isSynchronous": true
}Custom event triggers can be invoked via the Mission Control as well.
Head to the Eventing section and click the Trigger button for any event trigger in the Actions column to open the following form:
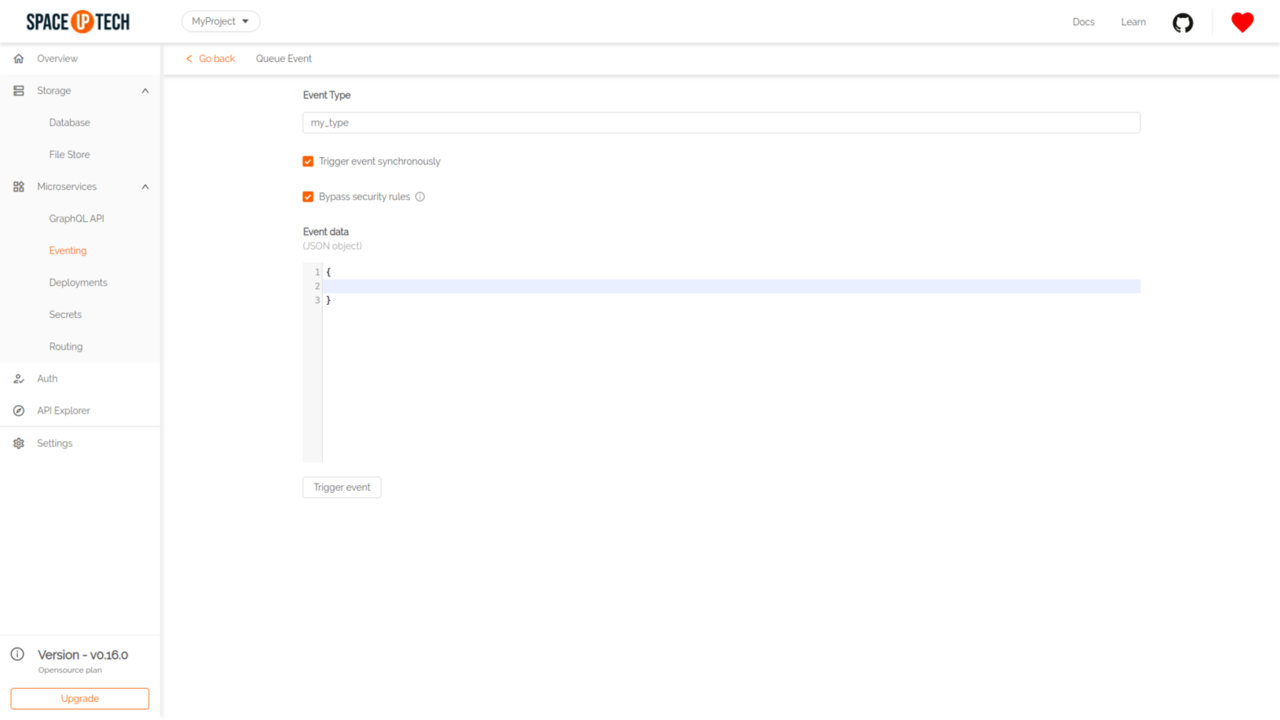
Check the Trigger event synchronously option.
Put the event data and hit Trigger.
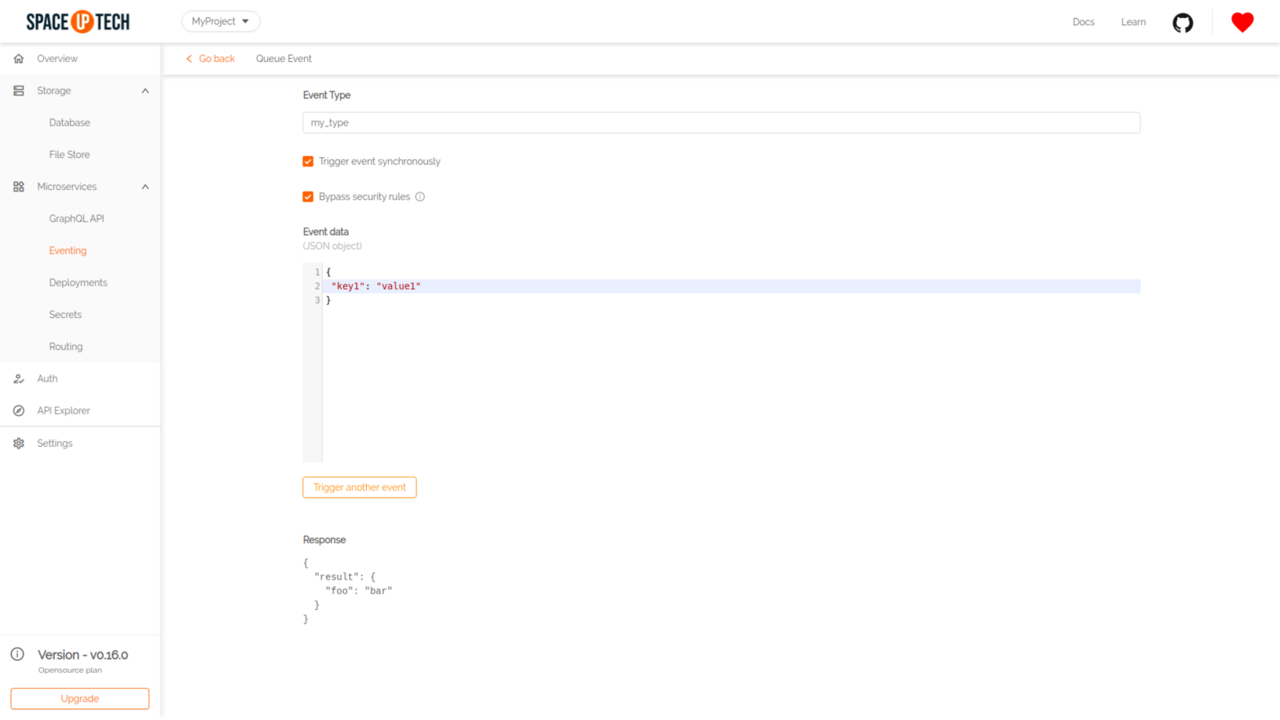
The event response will be shown in that page itself like this:
The webhook is delivered over HTTP POST request to the specified webhook URL with the following headers:
Content-Type: application/jsonThe POST body of the webhook is a JSON object which follows the Cloud Events specs:
{
  "specversion": "1.0-rc1",
  "id": "<unique-uuid>",
  "type": "<event-type>",
  "source": "<space-cloud-node-id>",
  "time": "<date-string>",
  "data": "Object"
}| Key | Type | Description |
|---|---|---|
| specversion | String | Version of the Cloud Events specifications. |
| id | String | A unique identifier of an event. |
| type | String | Event type. |
| source | String | Unique identifier of a Space Cloud instance. |
| time | String | Time at which the event occurred(ISO 8601 format). |
| data | Object | Event data sent by the client. |
For example,
{
  "specversion": "1.0-rc1",
  "id": "43e32d79-f2bf-41c0-be5f-a75c8c1bcfbf",
  "type": "my-custom-event",
  "source": "1fb07d5d-b670-468e-ba94-ad5f06a5c053",
  "time": "2019-10-19T12:40:50.053Z",
  "data": {
    "foo": "bar"
  }
}A 2xx response status code from the webhook target is deemed to be a successful invocation of the webhook. Any other response status results in an unsuccessful invocation that causes retries as per the retry configuration.
Have a technical question?


Improve the docs!
